
November 24, 2025
Dents are an inevitable part of owning a car. Whether caused by minor collisions, hailstorms, or stray shopping carts, these blemishes can harm both your vehicle’s aesthetics and its value. Thankfully, paintless dent removal (PDR) offers a fast, cost-effective, and environmentally friendly solution. In this comprehensive guide, we’ll explore the step-by-step process of PDR, as demonstrated on a damaged tailgate of a 2023 Audi A3. This guide is perfect for vehicle owners in McMinnville, Smithville, and surrounding areas who value transparency and quality service.
Paintless dent removal is a specialized process that restores a vehicle's body panels to their original shape without the need for fillers, sanding, or repainting. It’s achieved using tools like glue tabs, slide hammers, and push bars to carefully manipulate the metal back into place. The result is a flawless finish that preserves the factory paintwork and reduces repair costs.

In this demonstration, a noticeable dent on the tailgate of a 2023 Audi A3 takes center stage. The dent sits on a steel panel along the body line, where the car’s structural strength increases. This location presents a unique challenge due to the tension and bulging caused by the impact.
Key details about the damage:
Let’s break down the step-by-step repair process.
Every successful PDR begins with preparation. The damaged area is cleaned thoroughly using a degreaser and a clean cloth. This ensures the surface is free of grease, dust, or polish, which could interfere with tools and adhesives.
Using a microfiber cloth prevents scratches and ensures a smooth working surface.
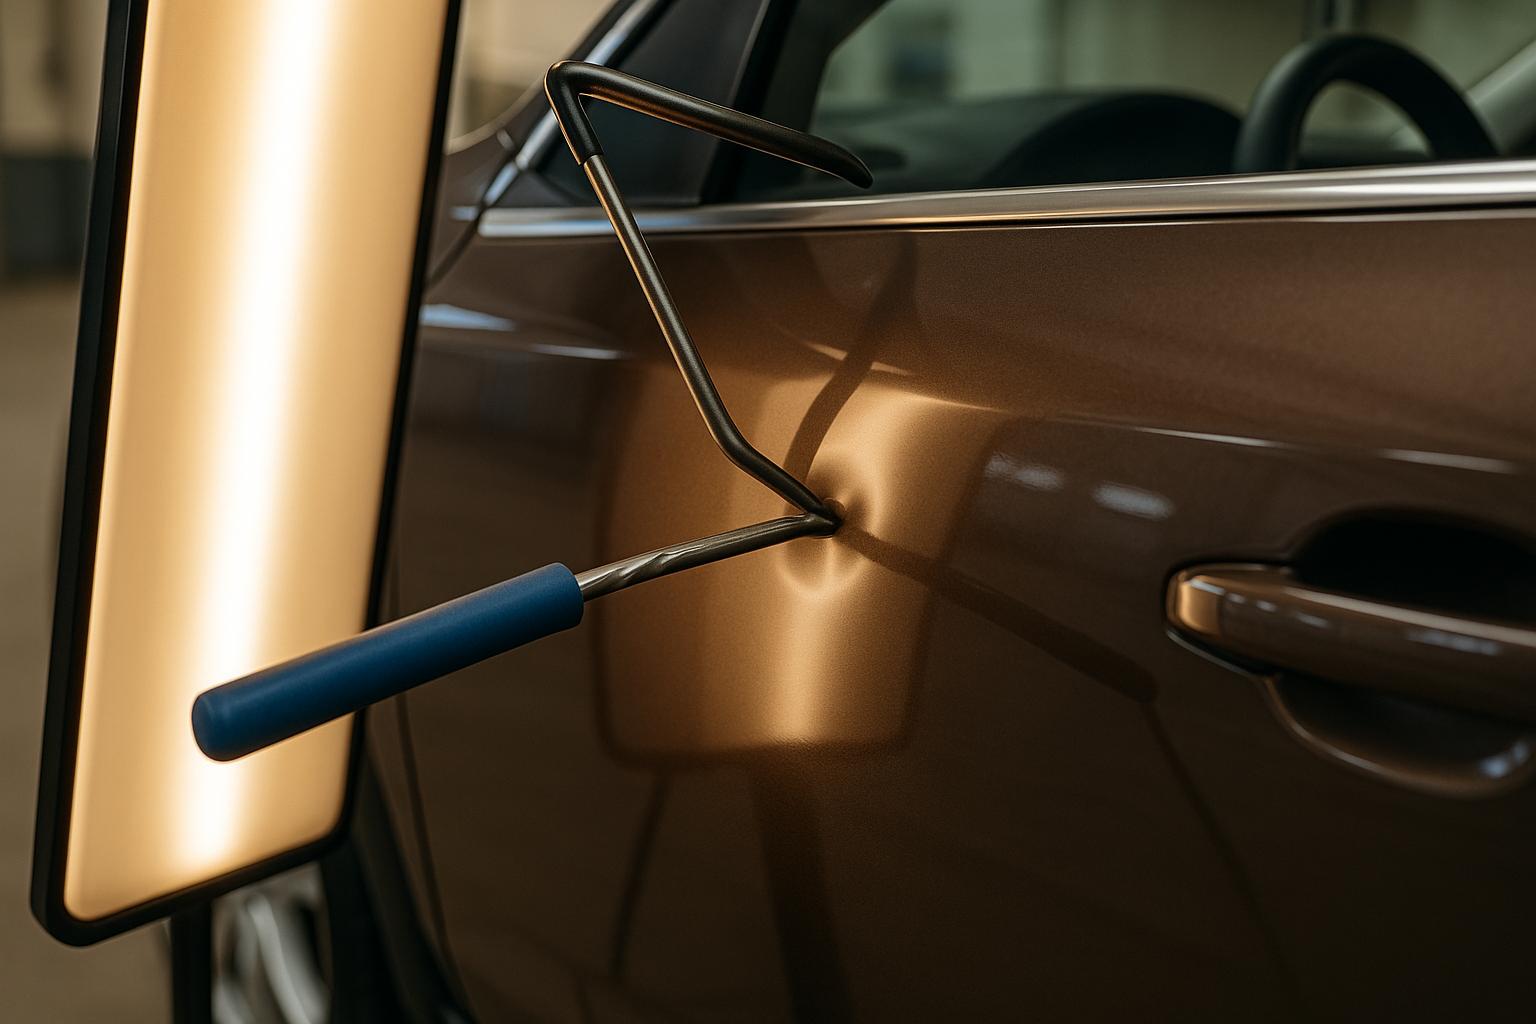
To start addressing the dent, the technician uses a glue tab to test how the metal reacts to gentle pulling. A dome-shaped glue tab is chosen to align with the dent’s curve, ensuring a controlled pull.
Why Glue Pulling First? Glue pulling minimizes push marks that can occur when using rods or bars directly against the panel. This technique is ideal for the initial stages of repair, especially when access to the back of the panel is limited.
Dents often create surrounding high spots, known as crowns, where the metal bulges outward due to tension. These areas require careful tapping with specialized knockdown tools to release stress and allow the panel to settle back into place.
Apply heat until the surface feels warm to the touch, but avoid overheating, which could warp the paint.
Once the bulk of the dent is lifted, the technician shifts to more precise tools. A double-bend push bar with screw-on tips is used to access the back of the panel through pre-existing holes (e.g., behind the number plate light).
By alternating between gentle pushes and additional knockdowns, the metal is slowly massaged back to its original shape. This step requires patience and a keen eye for detail.
A critical part of the PDR process is reviewing the repair from multiple angles. Body panels reflect light differently depending on the viewing perspective, so technicians use light boards to highlight remaining imperfections.
Cornrows or tramlines - subtle ridges left behind during repair - are carefully addressed. Even the smallest deviations are smoothed out with precision tools to ensure a flawless finish.
The last step is to inspect the area for surface-level scratches or paint damage. In this case, a light polish removes minor imperfections in the lacquer. Once satisfied with the result, the technician reassembles the number plate light and trim, ensuring the vehicle is returned in pristine condition.
PDR isn’t just about aesthetics - it’s a smarter way to repair vehicles. Here’s why:
The 2023 Audi A3’s dented tailgate presented a challenge, but with the right tools, techniques, and patience, it was restored to its original condition without fillers or paint. Paintless dent removal is not just a repair method - it’s an art form that combines craftsmanship and science to deliver immaculate results.
For vehicle owners in McMinnville, Smithville, and nearby areas, understanding PDR could save you time, money, and the stress of dealing with traditional repair shops. While repairs like this require professional expertise, knowing the process empowers you to make informed decisions about your vehicle’s care. The next time a dent appears, consider paintless dent removal - a transformative solution for modern car care.
Source: "Complete Guide to FIXING an Audi DENT to Perfection, with Paintless Dent Removal" - Dent-Remover, YouTube, Sep 6, 2025 - https://www.youtube.com/watch?v=vTI4DB1d3wg
